Welcome to the manual of Pidgin Internet Messenger
This tutorial will show you how to use Google Talk via Pidgin in Ubuntu 12.04
Use Google Talk via Pidgin
You can install pidgin by running below command in your terminal
sudo apt-get install pidgin |
OR
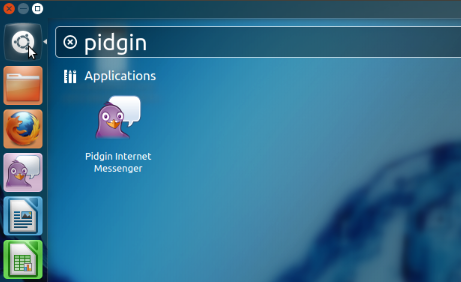
You can launch pidgin from the Launcher or from the Dash
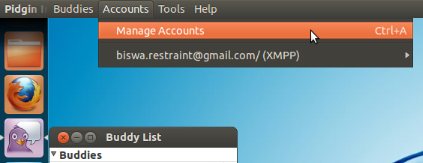
While pidgin IM is active; on the Top bar it shows the functions such as "Buddies", "Accounts", "Tools", "Help"
Under Accounts tab >> click on 'Manage Accounts' >>
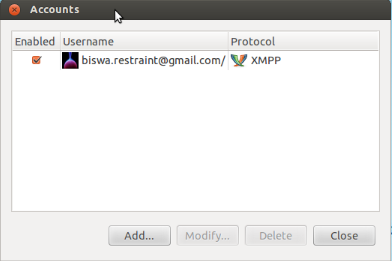
Then the 'Accounts' window appears.
Then click on the 'Add...' button
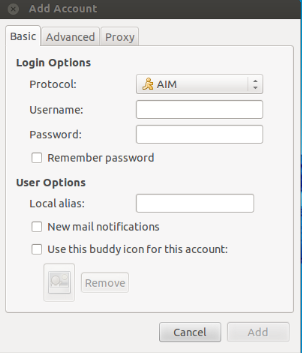
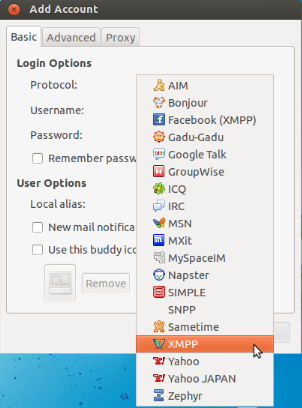
A window named 'Add Account' appears.
Under the Basic tab Choose XMPP as the Protocol.
After selecting XMPP as the Protocol fill in the other fields such as
- User Name: your Google Talk username (without any @ symbol or domain).
- Domain: auroville.org.in
- Resource: You can leave this field blank
- Password: we suggest leaving this field blank for increased security, but if you’d like to sign in automatically, enter your password
- Local Alias: leave this field blank
- Remember password: check the box if you’d like Pidgin to remember your password (you won’t be prompted to enter it each time you sign in, if you select this option)
- New mail notifications: check the box if you’d like Pidgin to notify you of unread email in your inbox.
Under the Advanced tab
Connect Server: Enter a server value depending on your type of account:
- Gmail users should enter gmail.com
- Google Mail users (example@googlemail.com) should enter googlemail.com
- If you’re signing in with a Google Account that’s not linked to any Google email product, enter gmail.com
- Google Apps users, please visit the Apps Help Center for instructions
